Description
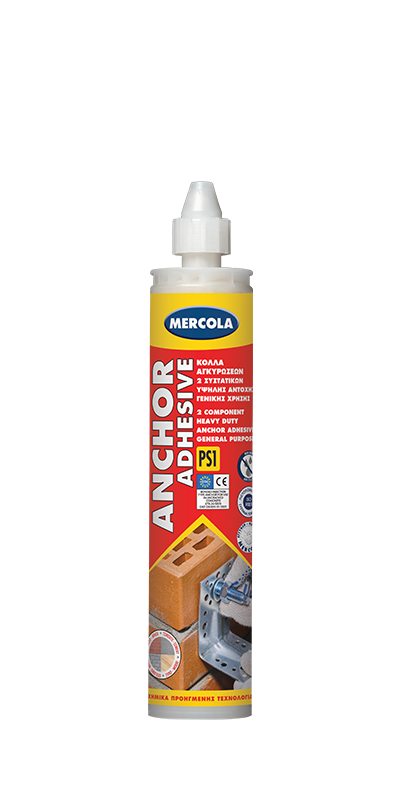
ANCHOR ADHESIVE PS1 s a 2-component rapid-curing polyester-based chemical anchoring system for low to medium loads in masonry and medium to high loads in concrete. It has a light odor (suitable for indoor use) and exhibits zero shrinkage. It can be used in masonry and concrete, in dry and wet conditions, and in horizontal and vertical applications (does not drip).
ADVANTAGES
- Rapid curing
- Approved for applications in concrete even in wet conditions (ETAG 001 Option 7)
- Applications in masonry
- Suitable for applications in solid and perforated bricks
- Medium load-bearing capacity
- Applied with a standard hand gun for cartridges
- Does not slip, even in roof applications
- Creates watertight anchorings - welds
- Low consumption - maximum economy as it requires a minimum hole opening: e.g. M20 requires only a 22mm hole
APPLICATIONS
Anchoring - fixing with:
- Rods / reinforcements
- Anchor screws with thread (nuts)
- Screws and special fixing systems
Suitable substrates:
- Concrete
- Masonry with solid and perforated bricks
- Natural and artificial stones of high hardness
- Compact rocks
- Stone structures with gaps
Ideal for installations in: Roofs, ventilation systems, fences, handrails, wall supports, signs, safety bars, railings, shelves, machines, satellite dishes, balcony fences, etc.
It is advisable to carry out a suitability test prior to any application in terms of the desired bonding strength, and for the prevention of surface staining due to the wide variety of possible substrates, in terms of strength, composition and porosity.
Specifications
 |
 |
 |
 |
|
Coverage:
depends on the diameter and depth of the hole
|
Thinning:
no
|
Application:
by caulking gun
|
Initial bonding:
1.5 - 18 minutes
|
 |
 |
 |
 |
|
Final bonding:
10 - 145 minutes
|
Exterior use
|
Interior use
|
Application temperature:
5oC - 35oC
|
 |
|
|
|
|
Cleaning:
with nitro solvent
|
|
|
|
Instructions for use
INSTRUCTIONS FOR USE
Hollow Substrate Installation Method
- Drill the hole to the correct diameter and depth. This should be done with a rotary percussion drilling machine to reduce spalling.
- Thoroughly clean the hole in the following sequence using a brush with the required extensions and a source of clean compressed air. For holes of 400mm or less deep, a blow pump may be used: Brush Clean x1. Blow Clean x1.
- Select the appropriate static mixer nozzle for the installation, open the cartridge/foil pack and screw nozzle onto the mouth of the cartridge. Insert the cartridge into a good quality applicator.
- Extrude the first part of the cartridge to waste until an even colour has been achieved without streaking in the resin.
- Select the appropriate perforated sleeve and insert into the hole.
- Insert the mixer nozzle to the bottom of the perforated sleeve, withdraw 2-3mm then begin to extrude the resin and slowly withdraw the mixer nozzle from the hole ensuring that there are no air voids as the mixer nozzle is withdrawn. Fill the perforated sleeve and withdraw the nozzle completely.
- Insert the clean threaded bar, free from oil or other release agents to the bottom of the hole using a back-and-forth twisting motion ensuring all the threads are thoroughly coated. Adjust to the correct position within the stated working time.
- Any excess resin will be expelled from the hole evenly around the steel element showing that the hole is full. This excess resin should be removed from around the mouth of the hole before it sets.
- Leave the anchor to cure. Do not disturb the anchor until the appropriate loading time, has elapsed depending on the substrate conditions and ambient temperature.
- Attach the fixture and tighten the nut to the recommended torque. Do not overtighten.
Solid Substrate Installation Method
- Drill the hole to the correct diameter and depth. This can be done with either a rotary percussion or rotary hammer drilling machine depending upon the substrate.
- Thoroughly clean the hole in the following sequence using a brush with the required extensions and a source of clean compressed air. For holes of 400mm or less deep, a blow pump may be used: Blow Clean x2 -> Brush Clean x2 -> Blow Clean x2 -> Brush Clean x2 -> Blow Clean x2. If the hole collects water, the current best practice is to remove standing water before cleaning the hole and injecting the resin. Ideally, the resin should be injected into a properly cleaned dry hole.
- Select the appropriate static mixer nozzle for the installation, open the cartridge/foil pack and screw nozzle onto the mouth of the cartridge. Insert the cartridge into a good quality applicator.
- Extrude the first part of the cartridge to waste until an even colour has been achieved without streaking in the resin.
- If necessary, cut the extension tube to the depth of the hole and push onto the end of the mixer nozzle. Attach extension tubing and resin stopper.
- Insert the mixer nozzle (resin stopper / extension tube if applicable) to the bottom of the hole. Begin to extrude the resin and slowly withdraw the mixer nozzle from the hole ensuring that there are no air voids as the mixer nozzle is withdrawn. Fill the hole to approximately ½ to ¾ full and withdraw the nozzle completely.
- Insert the clean threaded bar, free from oil or other release agents to the bottom of the hole using a back-and-forth twisting motion ensuring all the threads are thoroughly coated. Adjust to the correct position within the stated working time.
- Any excess resin will be expelled from the hole evenly around the steel element showing that the hole is full. This excess resin should be removed from around the mouth of the hole before it sets.
- Leave the anchor to cure. Do not disturb the anchor until the appropriate loading time, has elapsed depending on the substrate conditions and ambient temperature.
- Attach the fixture and tighten the nut to the recommended torque. Do not overtighten.
Caution
The anchor must be placed within the working time (consult table). During the hardening time the anchor must not be moved or loaded.
For applications in hollow bricks, aerated concrete blocks and stones an internal threaded socket must be used.
When the work is interrupted the static mixer can remain on the cartridge after the gun pressure has been relieved. If the resin has hardened in the nozzle a new nozzle must be attached.
Do not use after expiry date.
CLEANING
Wash hands and skin thoroughly with warm soap water. Clean residues while still wet with nitro solvent. Cured material can only be removed with mechanical means.


